In this article. I will show you how to install the Arduino IDE software on Windows 10.
Arduino IDE is software for progaming Arduino Board. This software is used as a text editor to create, open, edit, and validate Code for Arduino. The Code or Program in Arduino is called “sketch“.
Beside the text editor, This application is also include :
- Compailer : to make sure the sketch is correct
- Uploader : to upload sketch to the arduino boards
This application will be used to create arduino projects which I will post in the next article.
Let’ start.
Supplies
//
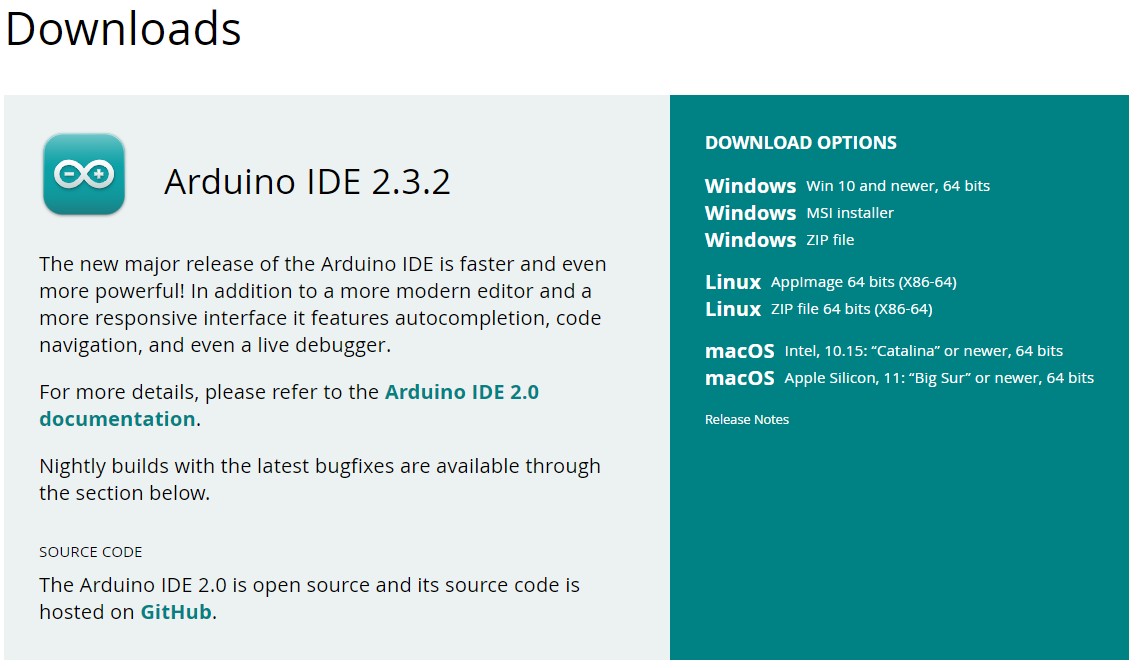
Step 1: Download File Arduino IDE


Click the link below to download the Software :
On that page, there are 3 download options for Windows.
- Windows Installer : The software will be installed in Windows operating system and required admin access.
- Windows Zip file : To make a portable installation.
- Windows App : for Windows 8.1 or 10.
I suggest the first option. because it directly install all your needs to use the Arduino IDE Software, and include drivers for the the Arduino board. If you choose the Zip file you need to install the driver manually.
Click Windows Installer, then click “just download” or “Contribute & Download“.
After the download is complete, open the installer file and start installing.
Step 2: License Agreement
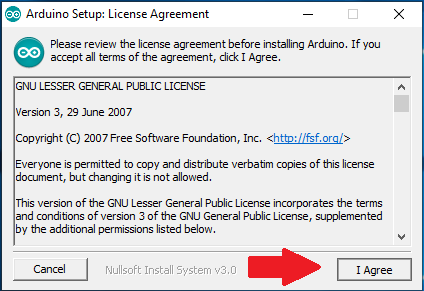
After the file is run, the “License Agreement” page will apper. You can read it, then click “I Agree” to continue.
Step 3: Installation Option
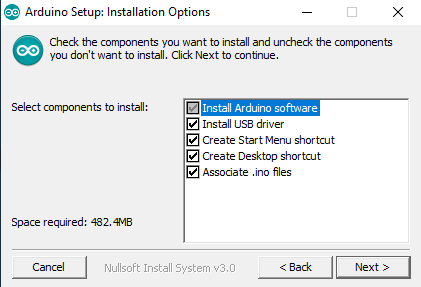
Check the component that you want to install and uncheck the components that you don’t want to install. I suggest installing all componen. Click “next” to continue.
Step 4: Installation Folder

Arduino will automatically be installed in “C:\Program Files (x86)\Arduino“. If you want to change the folder, click “Browse” and select the desired folder. Click install to start the installation.
Step 5: Installing Proses
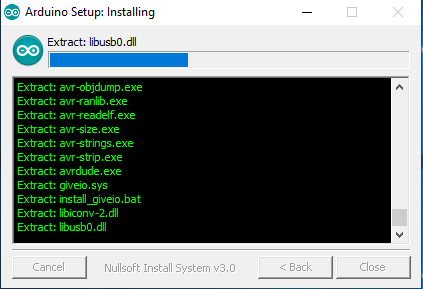
The installation process is ongoing.
Step 6: Installation Complete

If there is written “complete“, it means that the isntallation process is complete. click “Close“.
Step 7: Open Arduino IDE


After the installation process is complete, there will be an Arduino icon on the Desktop. Or check on the search icon and write “arduino”. If you have found the arduino icon, run the application.
Step 8: Display Arduino IDE
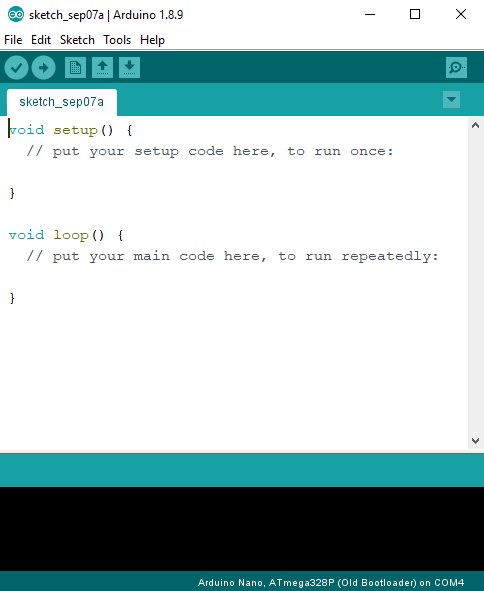
This is a display of the Arduino IDE Software. The application is ready to be used to create amazing projects. Wait for my next article about a simple project using arduino.
https://drive.google.com/file/d/1gpVwB4QQ8wsG-S7WcqFHgHZgZnBadNv9/view?usp=sharing