The bootloader is the program burned into an Arduino board and runs the moment the Arduino is powered on or when the reset button is pressed. This piece of code is what initiates the sketch that’s uploaded to the board. Another vital function of the bootloader is that it provides a means for the computer to upload a new program into the Arduino board and write it onto the Arduino’s memory.
When purchasing a “clone” Arduino, specifically the Nano CH340, there are times when the microcontroller doesn’t come with a bootloader. It’s also possible for the bootloader to get corrupted, possibly due to a bad sketch, and over or under-voltage to the power inputs or I/O pins. In any case, this leads to the board not being detected by the computer.
Before concluding to a faulty or lack of a bootloader, please make sure to check that all requirements for programming a Nano CH340 have been met. For instructions on how to prepare for programming a Nano CH340, you can read up on our last post, which is found here. Please note that burning a bootloader requires proficiency with Arduino and electronics and is not advisable for novice users. However, we learn from our mistakes.
What you will need
For this, you will need a couple of things:
- Arduino UNO (which we will now also refer to as the “programmer”)
- Nano CH340 (which we will now also refer to as the “target”)
- 6 x Jumper wires (basically any wiring solution)
- Arduino UNO cable (USB type B, for the connection to the computer)
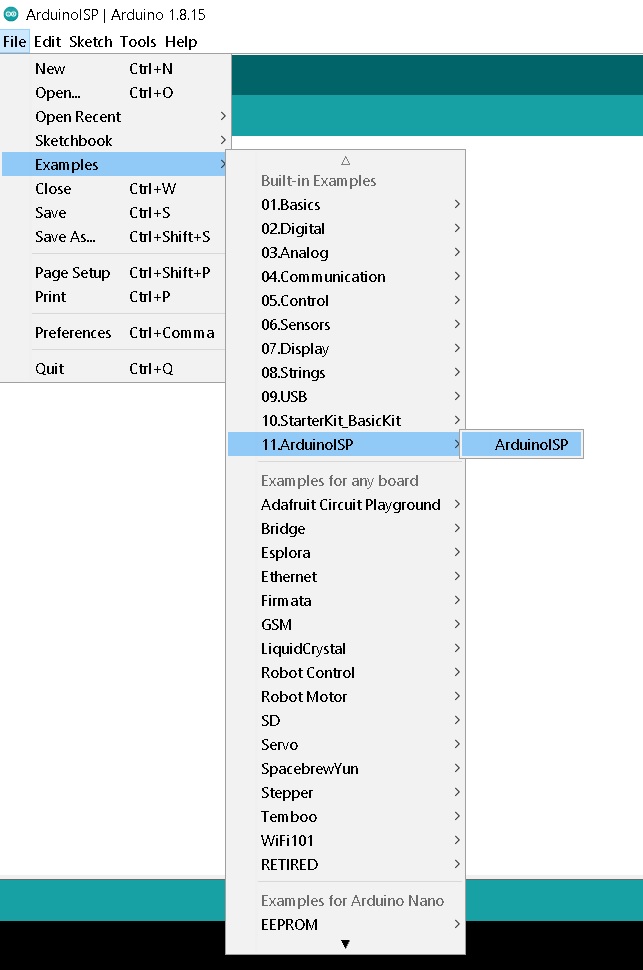
Step 1: Uploading the ArduinoISP
The first step involves uploading the ArduinoISP sketch to the programmer. Connect the programmer to your computer and upload the ArduinoISP sketch. You can find the code at Files > Examples > 11. Arduino ISP > ‘ArduinoISP‘.
See also Battery powered LoRa sensor node
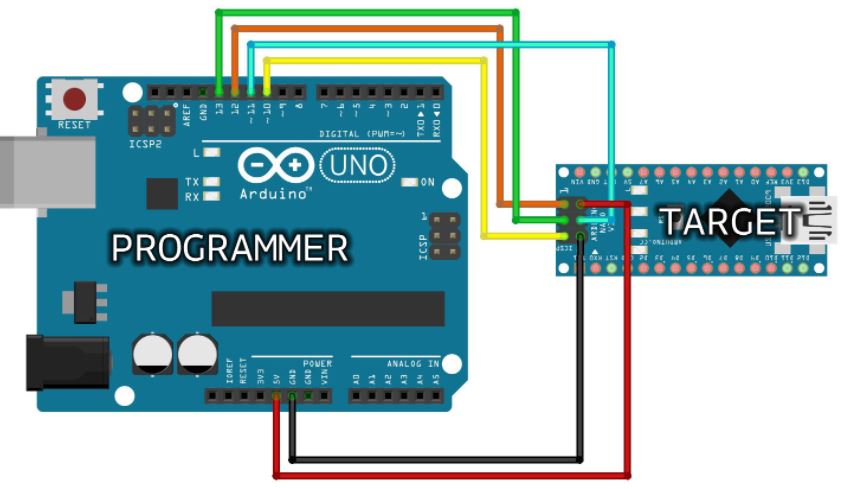
Step 2: Wiring the Programmer
Although simple, it is important to double-check this step. Wire the programmer to the target as shown below. UNPLUG THE ARDUINO FROM THE USB PORT BEFORE DOING SO.

As a reference, the pin configuration for the Nano ICSP is show below:
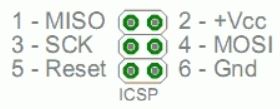
If the image above is not enough, the table below will indicate which Arduino UNO pins are connected to the Nano CH340 pins.
| Arduino UNO (Programmer) | Nano CH340 (Target) |
| PIN 10 | ICSP 5 |
| PIN 11 | ICSP 4 |
| PIN 12 | ICSP 1 |
| PIN 13 | ICSP 3 |
| 5V | ICSP 2 |
| GND | ICSP 6 |
Step 3: Connect to PC
After uploading the ArduinoISP sketch and wiring the programmer to the target, it’s time to connect the programmer to your computer once again..
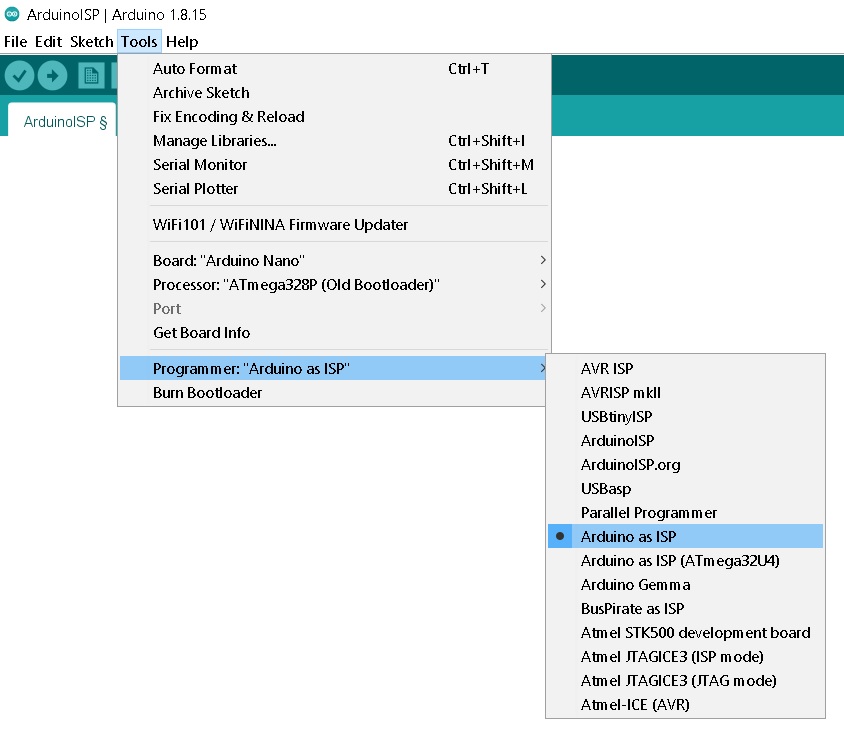
Step 4: Setup
Before clicking on the burn option, you must first select the proper ISP (in-system programmer). Select the ISP by going to Tools > Programmer > Arduino as ISP
Step 5: Burn
After all the setting up and the wiring, it’s not time to click on “Burn Bootloader” under the Tools menu.
Link:https://learn.circuit.rocks/burning-bootloader-into-nano-ch340